Hey everyone, welcome to my recipe page, if you're looking for Mike's Seafood School 101 recipe, look no further! We provide you only the perfect Mike's Seafood School 101 recipe here. We also have wide variety of recipes to try.
Before you jump to Mike's Seafood School 101 recipe, you may want to read this short interesting healthy tips about Healthy Eating Doesn’t Have To Be A Chore.
Healthy eating is now much more popular than before and rightfully so. There are numerous illnesses linked with a poor diet and there is a cost to the overall economy as people suffer from health problems such as heart disease and high blood pressure. Wherever you look, people are encouraging you to live a more healthy lifestyle but then again, you are also being encouraged to rely on convenience foods that can affect your health in a detrimental way. It is likely that lots of people assume it will take lots of effort to eat a healthy diet or that they have to make a large scale change to the way they live. In reality, however, merely making a couple of modest changes can positively impact day-to-day eating habits.
One way to deal with this to begin seeing some results is to realize that you do not need to change everything instantly or that you need to entirely eliminate certain foods from your diet. It’s not a bad idea if you desire to make major changes, but the most important thing is to bit by bit switch to making healthier eating choices. Soon enough, you will discover that you actually prefer to ingest healthy foods after you have eaten that way for some time. As you stick to your habit of eating healthier foods, you will find that you will not wish to eat the old diet.
As you can see, it is not hard to start to make healthy eating a regular part of your daily lifestyle.
We hope you got insight from reading it, now let’s go back to mike's seafood school 101 recipe. To make mike's seafood school 101 you only need 6 ingredients and 9 steps. Here is how you do that.
The ingredients needed to cook Mike's Seafood School 101:
- You need 4 Lobsters
- Prepare 8 large King Crab Legs
- Take 24 large Shrimp Or Prawns
- Use 24 large Fresh Mussels
- You need 24 large Clams
- Provide 16 Fresh Oysters
Steps to make Mike's Seafood School 101:
- Cooking information on Lobsters, Alaskan King Crab Legs, Shrimp, Scallops, Oysters, Mussels and other Hard Shelled Clams.
- LOBSTER - - Preparation and Handling - - Bring a large pot filled with water deep enough to submerge the lobster by about 3 inches to a strong boil. - - Place lobsters head first into the pot, completely submerging them. - - Cover the pot tightly and return to a boil as quickly as possible. When water boils, begin counting the time. Regulate the heat to prevent water from boiling over, but be sure to keep the liquid boiling throughout the cooking time. - - Boil lobster for 10 minutes per pound, for the first pound. Add 3 minutes per pound for each additional pound thereafter. For example, a 2-pound lobster should boil for 13 minutes and a 1 1/2 pound lobster should boil for 11 1/2 minutes. - - Lobsters are done when the outer shell is bright red, when the meat is white, or when the two front antennae pull out easily. Do not overcook. - - Carefully remove lobsters from the pot with tongs. Be careful, they are very hot. Set in a large bowl for five minutes to cool before cracking.
- ALASKAN KING CRAB LEGS - - Preparation and Handling - - Properly wrapped Alaska King Crab can be stored in the home freezer at 0 degrees F or lower up to 4 months. For optimum quality, thawed crab or crab meat can be stored in the refrigerator 1 to 2 days. - - Cooking: - - Be careful not to overcook your king crab as it will reduce the king crab's prized texture and taste. - - Chilled: - - Place frozen crab legs in a shallow pan or on a tray. Cover with plastic wrap or foil and thaw, refrigerated, 8 to 10 hours or overnight. Simply cut up and eat chilled with fresh lemon and lime wedges. - - Steam: - - Place steam basket in large pot; fill pot with boiling water to depth of 3/4 inch. - - Place Alaska King crab legs in basket; reduce heat and steam, covered, about 5 minutes or until crab is thoroughly heated. Serve with plenty of melted butter and lemon. - - Broiled: - - Place Alaska King crab split legs in broiler pan, shell-side down; brush with butter or favorite sauce. - - Place pan about 4 inches from heat; broil 3 t
- SHRIMP OR PRAWNS - - Preparation and Handling - - To Peel & Devein Shrimp: - - Using your thumbs, split open the thin shell along the concave side, between the two rows of legs. Peel the shell away. Using a small knife, make a shallow slit along the back to expose the dark, veinlike intestinal tract. With a knife tip or your fingers, lift up the vein and discard. - - Boiled: - - Wash the fresh shrimp and peel & devein under running cold water. - - Salt the water lightly. You can also add some lemon juice and Old Bay Seasoning, if desired. - - Immerse in enough boiling water to cover the shrimp. - - Begin to calculate the cooking times as soon as water boils again. - - Reduce the heat. - - Simmer 3 to 5 minutes until shrimp turn pink and firm. Do not overcook, as it is extremely easy to do. - - Drain immediately and cool rapidly in cool water or a bowl of ice to prevent further cooking.
- SCALLOPS - - Preparation and Handling - - Plan to cook fresh-shucked scallops soon after they arrive. - - Keep shucked scallops in their own sealed container. They can be refrigerated for up to 2 days. - - Sea Scallops freeze better than most seafood. Simply place scallops in a plastic container and top with milk before freezing. - - Though they may be large, sea scallops still cook quickly, so keep a close eye on them. Recipes often suggest cutting them in half across the grain before cooking, but the large size makes sea scallops a natural for the grill. - - Remove the little tab-like [tough] muscle on the side of the scallop before cooking. Rinse scallops under cold running water to remove any sand or grit and pat dry using a paper towel. - - Serving Suggestions: - - 1 pound would be an appetizer serving four. Or a main course for two. - - Don't microwave scallops - they will explode at higher settings. - - Sautéd: - - Heat 2 tbs olive oil in a heavy nonstick skillet over medium high heat. - - Add scallops, and salt
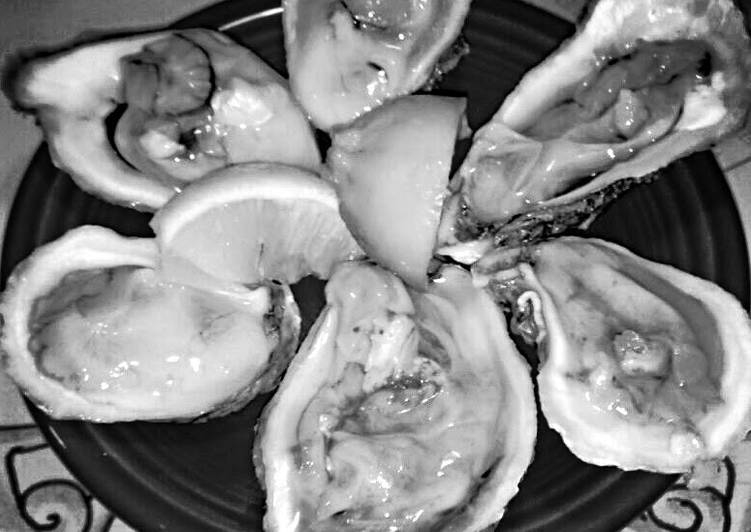
- OYSTERS Preparation & Handling Store oysters at 33°-40° in a damp cold. Oysters can be kept in a bowl draped with a damp towel, but they should be arranged carefully so they lie flat. Otherwise their briny liquid may drain out. Stored properly they should remain alive for 5 to 7 days, but know that freshness deteriorates with each day. Oysters still in the shell are best eaten soon after they arrive. An oyster that doesn't close when you press on its shell is dead and must be discarded. Shucked oysters and their juices should be wrapped airtight and can be stored under refrigeration for 4 to 5 days or frozen for up to 2 months.°Do not store oysters where they could freeze, or where temperatures will fluctuate widely or reach over 40° F. °Do not store oysters submerged in melted ice water or other standing water. °Do not store oy
- MUSSELS - - Preparing & Handling - - Plan to cook fresh [live] mussels soon after they arrive. - - Store mussels in a mesh bag if possible. This will help keep the shells closed. - - Healthy mussels will gape slightly, but if you tap two together they should close quickly - - Discard any broken or open mussels, or ones that will not close when runner banded together. - - Do not suffocate mussels by sealing them in a plastic bag or airtight container. - - Never keep mussels in a bowl with melting ice. NEVER eat a mussel whose shell is unopened AFTER cooking. - - Serving Suggestions: - - Generally 1/2 to 3/4 pound per person is served as an appetizer and 1 1/2 pounds would be a main course for 1 person. - - Cooking: - - Steaming: - - Just before cooking mussels in the shell, they should be scrubbed under cold water. - - Place one to two inches of water, wine or a combination of these, and steam over high heat about five to seven minutes until shells open widely. - - For extra flavor add a dash of wine, garlic and/or butter. - - Dis
- LITTLE NECKS AND OTHER HARD SHELLED CLAMS - - Preparing & Handling - - Keep live clams cold in the refrigerator, covered with wet kitchen towels or paper towels until you are ready to cook and serve them. - - Shucked clams should be kept in tightly covered containers, immersed in their liquor; they, too, should keep for up to a week. - - You can freeze shucked raw clams in their liquor in airtight containers. Most types of frozen raw or cooked clams will keep for two months if the freezer is set at 32° or colder. Be sure to thaw frozen clams in the refrigerator and never at room temperature. - - Serving Suggestion: - - Serve 1/2 dozen clams on the half shell per person. - - Do not put clams in an airtight container or submerge them in fresh water, or they will die. Never expose clams to sudden temperature changes. - - Cooking - - Little necks are the best served raw on the half shell. They are also delicious steamed, [see steamer clam directions above] used in chowder or sautéed with sauces or in a favorite past
- Enjoy!
If you find this Mike's Seafood School 101 recipe valuable please share it to your close friends or family, thank you and good luck.